Hi there! This is Sneha and I have recently altered a center bowl with some mixed media technique using Lindy's spray and Magicals.
This project is very special 💖to me as this glass piece was gifted to me by someone special on Thanksgiving 7 years back. I never wanted to part from this one and hence I altered it to treasure it as memories.
I had fun making these as I am using Lindy's products for the first time though I have always been fascinated by them for so long, but was never able to get them for myself. Seeing my love for Lindy's, my husband ordered them as a surprise for my birthday! Hence this project is so dear to me. I hope you will love it too 😊
Here is the step by step process in detail
So here I have taken a glass center piece and thoroughly cleaned it with 50% alcohol prior priming it with gesso.
Once the glass surface was clean and dry I applied acrylic gesso both inside and outside area of the glass piece. and allowed it to dry for couple of hours.
Now using Texture paste from Ranger and a home sponge created the background both on side and outside surface. this gave the glass piece a raised textured background. Obviously I allowed to dry😄
To fill my inside surface and to hold my elements on the top, I have used faux moss. I coated it with mix of white gesso and gel medium. This mixture with blend the faux moss with the project and will hold it in its place once placed in the bowl after drying
Tip: You can use mixture of white acrylic paint and white glue with little water.
Filled half portion of the glass piece with the moss using a spatula as I want to place my elements on half portion of the glass piece. I filled moss to a desired level and allowed it to dry for 6 to 8 hours
This is how the glass piece with dried moss looked like.
Once this was settled I place a cluster of thin dried hay with the help of gel medium
Meanwhile I started working on the embellishments, here I have taken dry clay ornaments, lace mold, and paper die cuts made prior this project. I coated clay ornaments and lace molds with white gesso.
I coated gesso on the paper die cuts and applied Lindy's
Yodeling yellow embossing powder on the die cut saying memories and
white pearl embossing powder from recollections on the big net die cut.
In the next step I have colored the outer surface and the top edges of the glass piece using Cattail copper brown magicals and Sassy Sapphire sprays one after the other and dried the colors in-between using heat dry
I sprinkled the magical on the surface with a soft brush and using water mister I allowed it to swirl and cover most of the surface. Here is the cattail copper brown on top edge and on the outer surface of the glass piece
I love the surprise and mesmerizing after effect this magical powder had left on the surface, have a look
And here are the pictures of the glass piece with the Sassy sapphire blue spray.
I directly applied the liquid color in the spray bottle tube.
On the outer surface I misted water on the liquid color again to help it swirl and cover maximum surface.
Here is the look of it.
In the next step I started playing with
Tibetan poppy teal magicals,
Prima donna purple spray and embossing powdered on the primed ornaments
Sprinkled and misted with water to swirl and cover maximum area

Applied liquid color through the dispensing tube directly and misted with water for maximum coverage
Have a look

I followed the same steps and enhanced all the elements.
To give more enhancement to all the elements, I used Bling-y Blonde spray
and followed the same steps as above.

Once the colors were applied, I embossed all the elements with
Recollection's Pink opaque tinsel embossing powder and this is how the overall element looked like
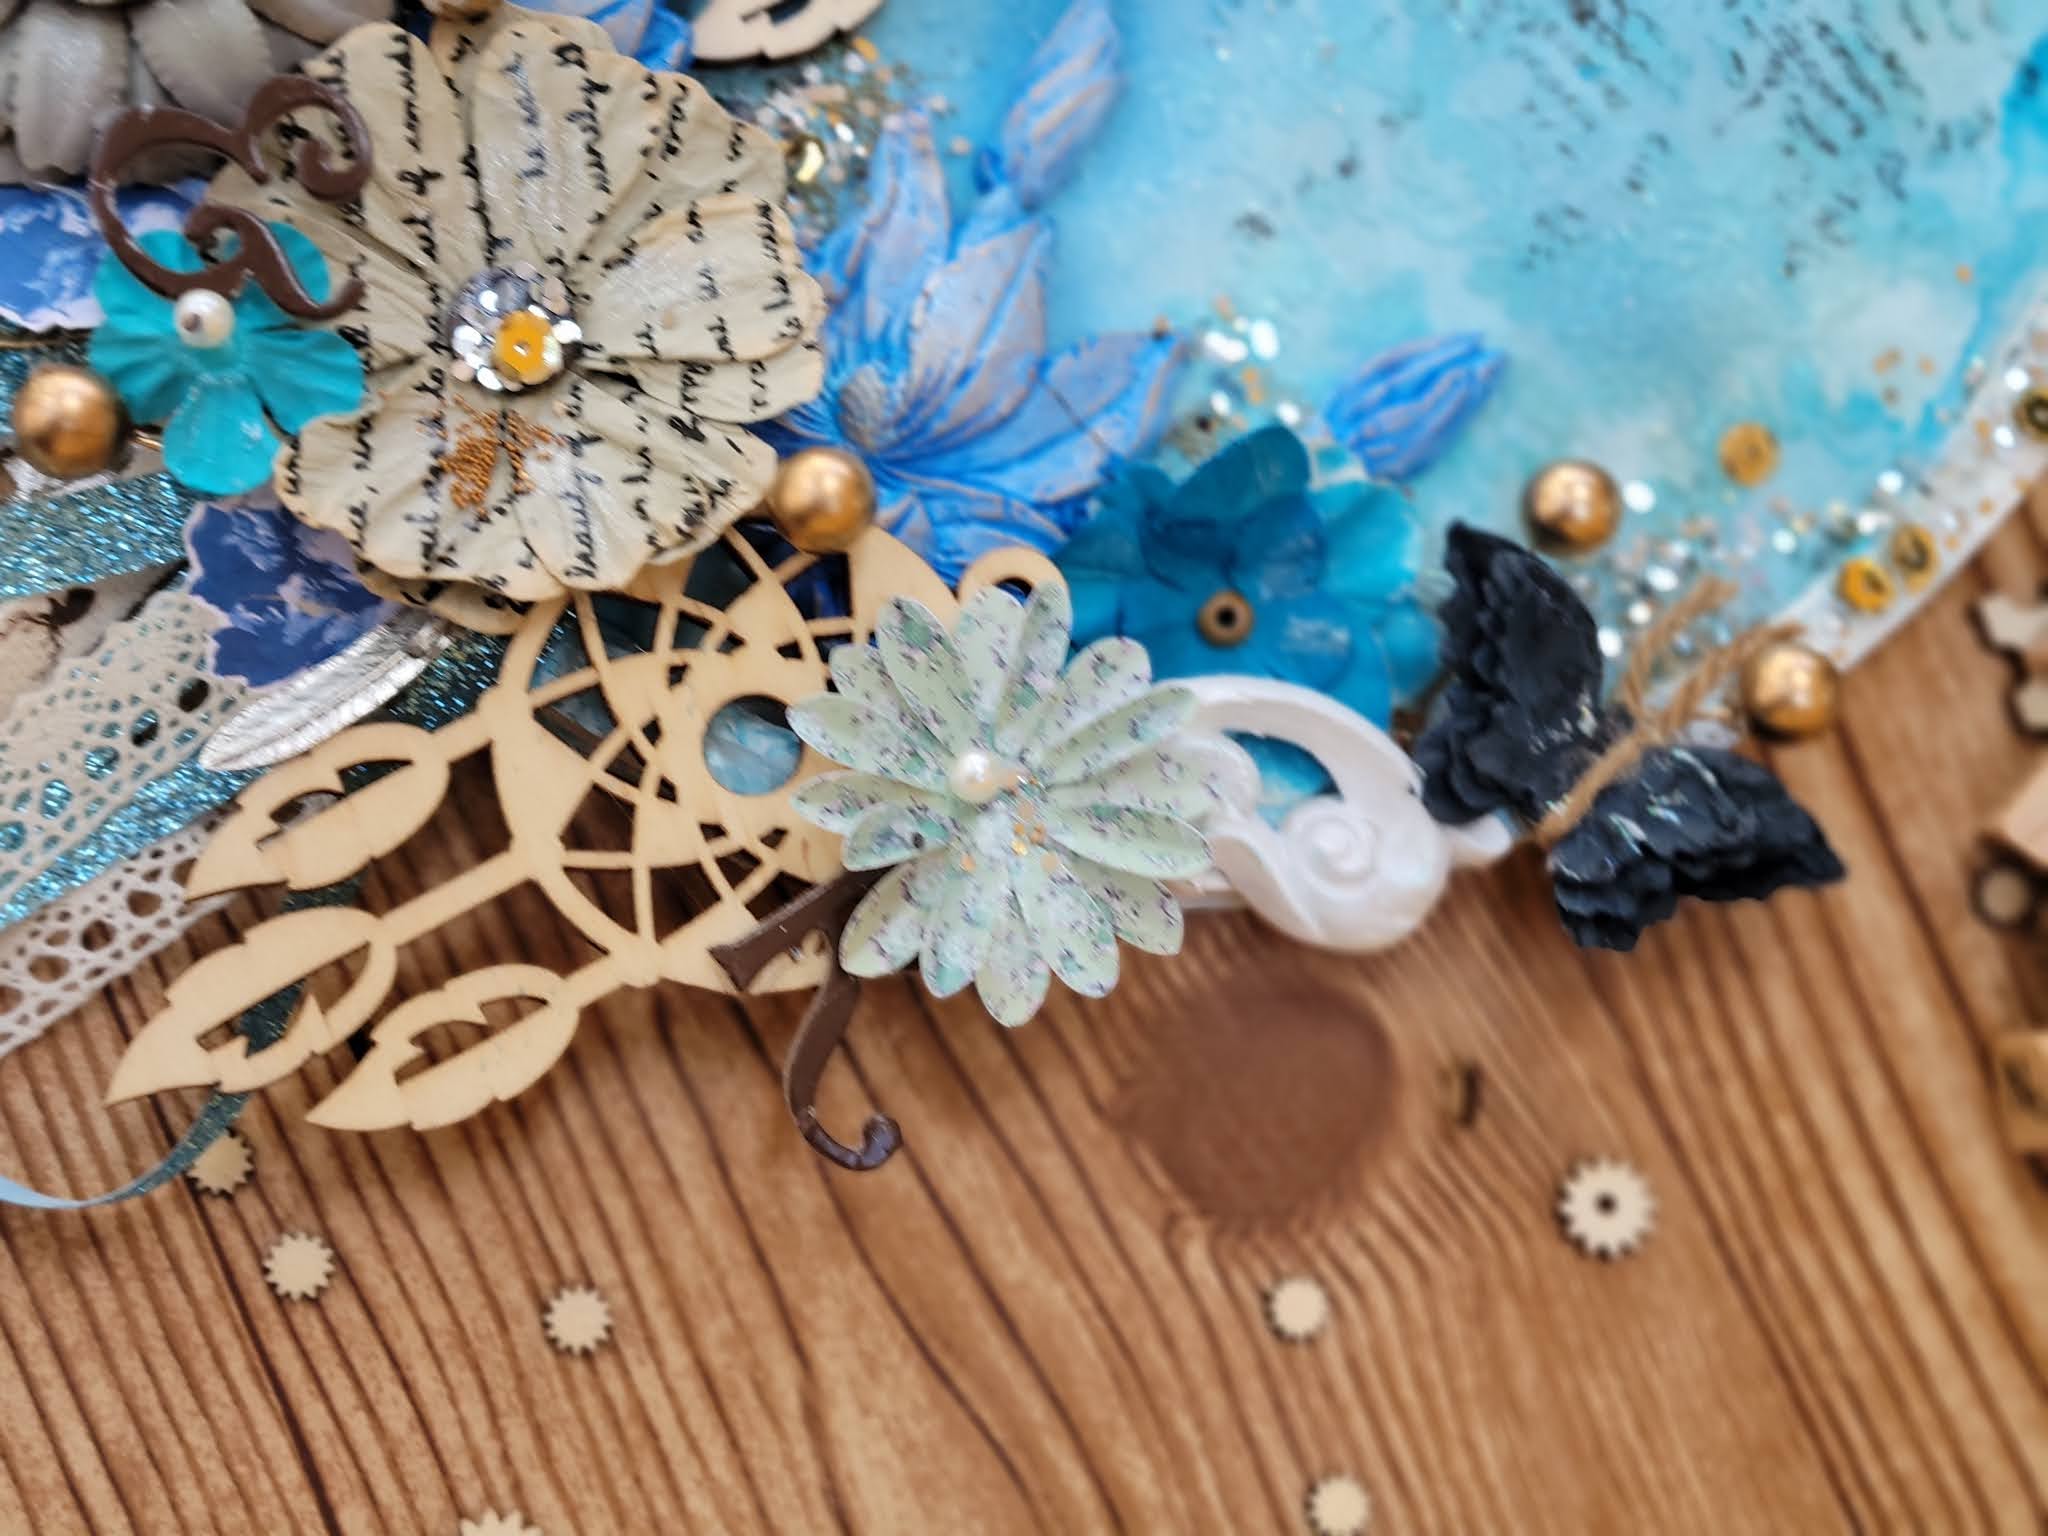
I then started assembling all the elements one by one to one half of the glass piece using hot glue.
👉 ( I used hot glue as I wanted this to stick all the elements instantly and did not wanted to move them once positioned )
This how the complete assemblage looked like:
Once the assemblage was done I felt to add more to the project so I sprayed starburst all color liquids from drop diva set on a mixed media paper and die cut it. I also added Nuvo crystals to the tip of the die cuts
Then glued theses die cuts ( not all of them ) to fill the empty looking spaces.
I distressed the die cut sentiment ( memories, which was embossed using Lindy's yodeling yellow embossing powder ) using Hi Maintenance Magenta spray and glued it to the project
For the final step I added some microbeads (bought from local craft store) here and there to the project using soft gel medium.
Here is the completed and final look of the project.
I hope it was a fun tutorial for you with a sensible step by step process explanation of this project.
Thank you! and have fun altering with Lindy's!